Victron EasyPlus 12/1600/70 inverter and charge controller.
The EasyPlus is a multifunctional energy system consisting of
in a single, lightweight, compact package.
Height: 510mm
Width: 214mm
Depth: 110mm
Weight: 11.7kg
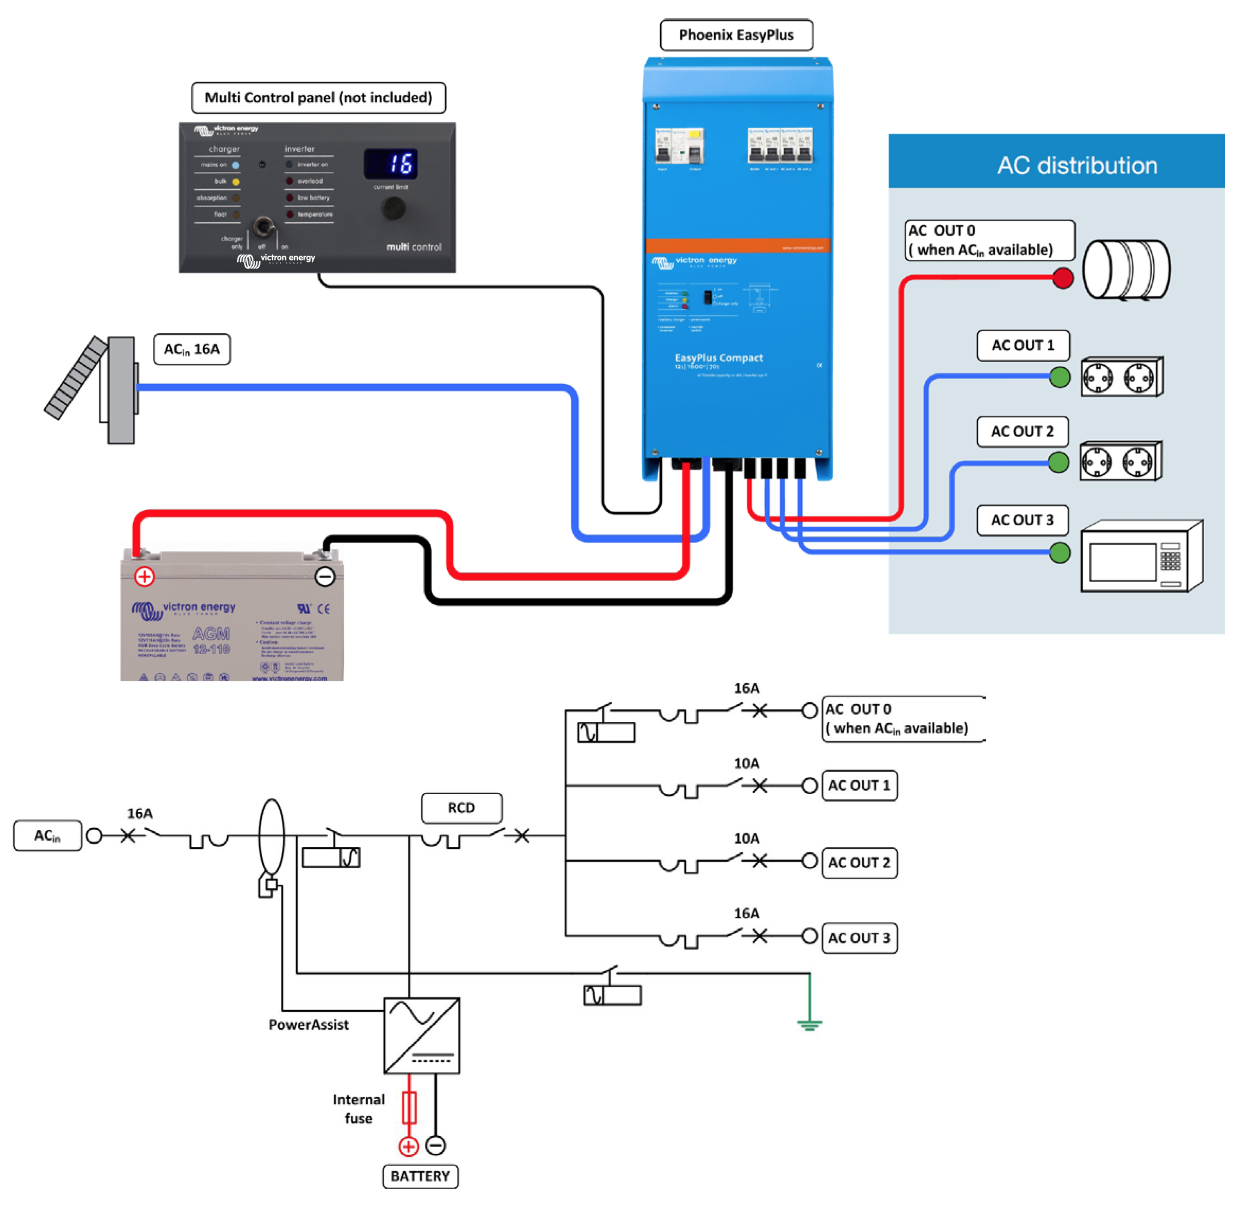
EasyPlus takes its name from its simplicity of installation and operation. The system can be installed in five simple steps, saving both time and space. The Easy Plus comes complete with AC connectors and sockets, and is supplied with battery cables already fitted, so you can save installation time.
Step 1. Choose a suitable location for the EasyPlus (as close as possible to the batteries) and install the wall bracket. Attach the EasyPlus to the bracket and secure it with the screws supplied.
Step 2. Connect the genset/generator input and output circuits
(including the water heater's dedicated power supply) to the Easy Plus.
Step 3. Connect the control panel (optional) with the UTP connection cable.
Step 4. Connect battery and temperature sensor cables for batteries
(Also supplied as standard).
Step 5. Switch on RCD, AC distribution, charger/inverter and
the system is ready for use.